Showing posts with label eggs. Show all posts

Tuesday, May 28, 2013

These Eggs!


Let's not dilly-dally! Let's not fuss around with stories and details (well, maybe just a little bit!). Let's just make some eggs! Right?


I love these eggs. LOVE. This, is, hands-down, my favorite egg dish ever. It's so easy. It's so versatile. It makes a perfect breakfast or lunch or brunch or dinner. This is, in fact, the recipe I've been using longer than any other. I can't wait for you to make these eggs.


If there is a food that you want to combine with eggs, put it in! Through the years, I have tried nearly every possible addition, and I'm not sure I could even declare a favorite. Every time I make this egg casserole, I say, this is the best egg casserole ever.


Spring is a delicious time to make these eggs. Most recently, I compiled fingerling potatoes, asparagus, green garlic, spring onions, white cheddar cheese, and chives. Mushrooms made it to the top, but not the insides (Andy's out on mushrooms, as we all know). I also love this casserole with cooked sausage as the bottom layer. I've used both ground pork sausage, bacon, and chopped spicy chicken sausage with great success. If there is a cheese you love, put it in! Or put it on top! Or use ten different cheeses! If there is a vegetable you love, put it in! Some of my favorites are spinach, red pepper, asparagus, onion, but I have tried some pretty wacky vegetables that have worked surprisingly well. Go southwest with it, and add pinto beans, corn, plus tomatoes or salsa on top. Go Greek with it and use spinach, feta, and olives. Go diner style and use potatoes, American cheese, and sausage. Go forest-style, and use asparagus, morels, goat cheese, and balsamic on top. Go Denver-omelet style and add onions, peppers, and ham. Agh! Everything is so good in these eggs!
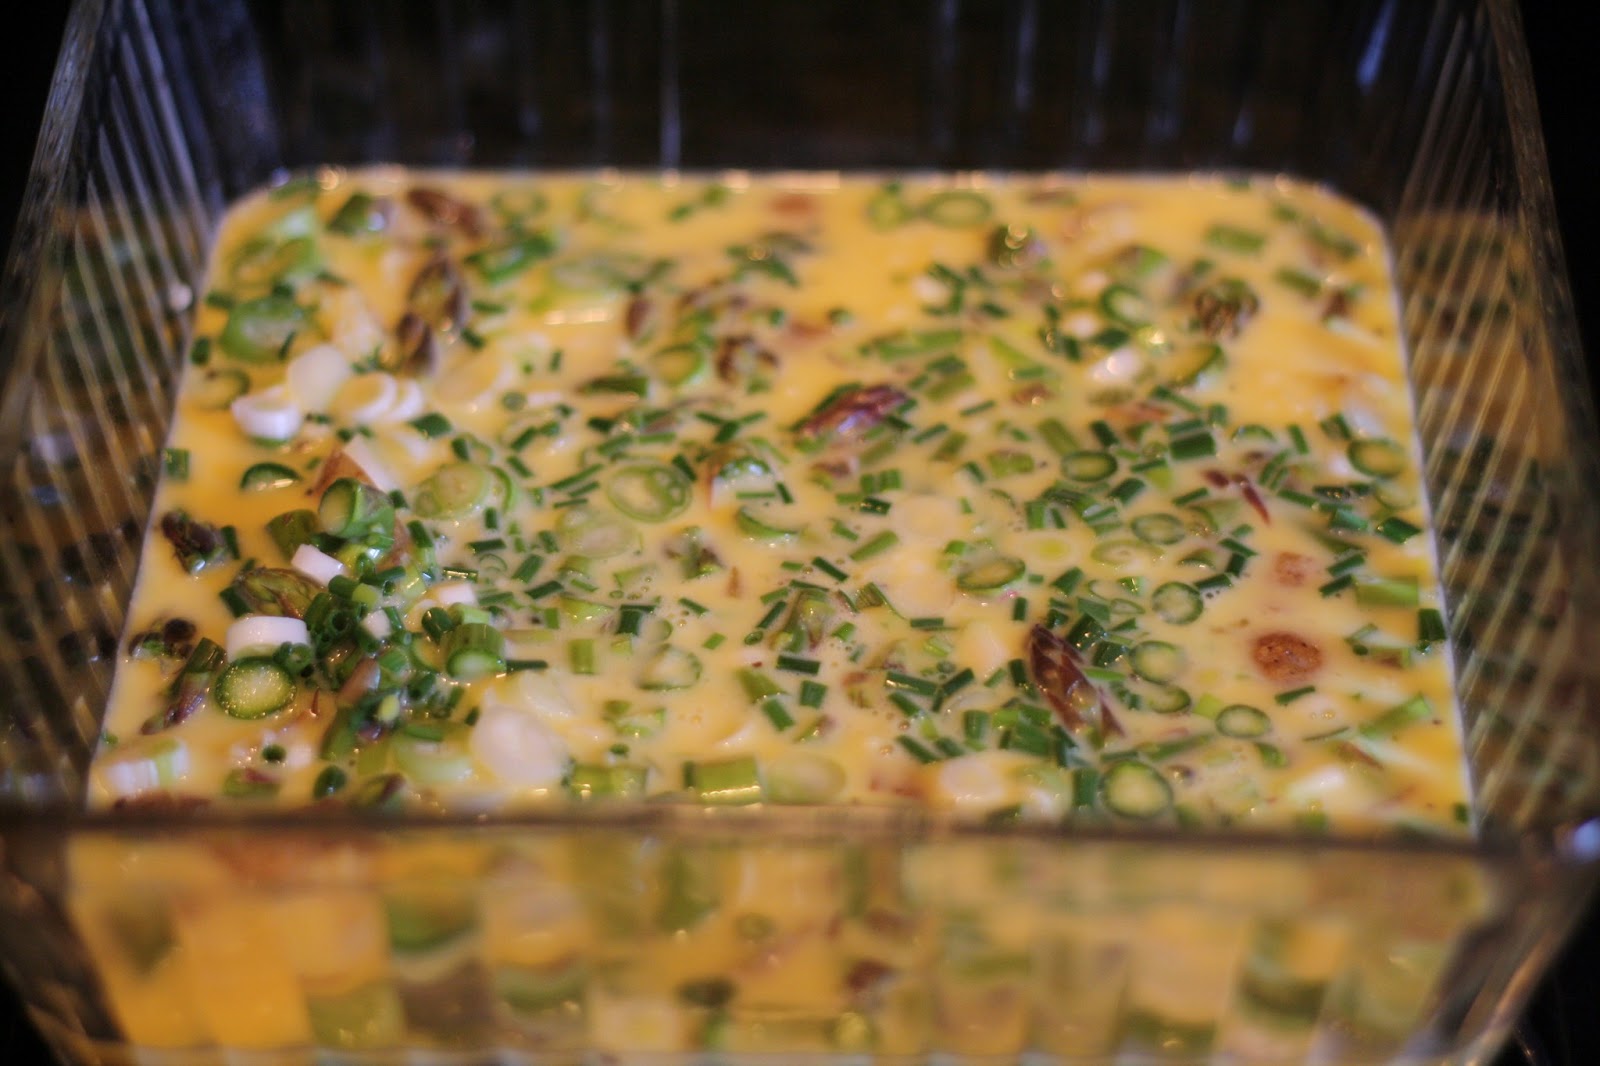

Are you watching this process? The steps are: put things in dish. Put in eggs. Bake. That's it!


Poof! It's done! You will be so happy. I just know it.

Egg Casserole
from the Honest To Goodness Cookbook
serves 4-6, or double it to serve 10-12

Preheat oven to 350.

Whisk these four things:
6 eggs
1/3 C half & half
1/2 t salt
1/2 t pepper

Grease a pan with butter or oil. I use a 9x9" for a 6-egger, and a 9x13" for the 12-egger. Layer up your bits! I like to add a layer of cheese on the bottom (a hard cheese, like cheddar, usually) and then add vegetables in layers. Pour eggs on top. Alternatively, you can mix the vegetables in with the eggs and pour everything into the pan. It's up to you!

Bake for 30 minutes, or until set and slightly poofy. Add another layer of cheese while it's still hot.

Serve with hot sauce, a little balsamic, or salsa, depending on what sorts of ingredients you put in there. Slices of the egg casserole are also lovely on a sandwich.

Friday, March 29, 2013

A Tisket A Tasket


The weekend is coming, and that can only mean one thing. 
EGGS IN A BASKET.

As a person who really only came into wet eggs a few years ago, I must say that this is all quite new for me. And now I really like wet eggs way more than I ever thought I would. Scrambled eggs still hold a very dear place in my heart, but a half-cooked egg is becoming more and more interesting to me all the time. Of all the variations out there, my very favorite wet egg preparation is this: egg in a basket. Or, you know, toad in the hole. Egg in a hole. Willy with a lid. Call it what you will, but just know that this is the most incredible thing to eat. And the ease! Pause here while I do swooning over its sheer simplicity. Let's do the thing where I tell you a recipe in the simplest terms I can come up with.

Egg In A Basket

Cut hole in slice of bread.
Crack egg into small bowl.
Heat butter in skillet.
Brown one side of bread and the hat.
Flip.
Add egg to hole.
Cook until desired doneness. 
Flip again, if you'd like, and cook for five more seconds to seal up the basket.

Okay, okay, wait. That was pathetic! I can do better:

Egg In A Basket

Cut hole.
Crack egg. 
Heat butter. 
Brown bread.
Flip.
Add egg.
Cook.
Flip.

Wait! One more! Shorter! Easier!

Egg In A Basket

Hole.
Egg.
Butter.
Brown.
Flip.
Egg.
Cook.
Flip.

And now, we've landed upon the newest name: 8-Word Egg!

My recent trick is to add some shredded sharp cheddar to the top so that when you do the second flip, the cheese browns and helps create that really nice seal on the top. I know that the traditional method is to not cook the second side, and to leave the egg quite wet and exposed, but give me a break! I'm still getting used to this whole wet egg thing. I need an expansive egg transition period, you know!

Also, a note on bread variety: once you try several types, you will find that there are kinds that work much better than others. If your eggs are large, they may not fit inside some bread-holes. You might need to use a larger glass or biscuit cutter to make the hole, or you may need a larger piece of bread. It's up to you, of course. I do really like a rustic sort of sourdough or country loaf for this project, but sandwich bread also definitely works. I've also been known to split eggs when the bread was too small to contain a large hole. So many possibilities with these holes and eggs!

So all of this talk brings me to 9:06 pm. We officially spoiled our supper with after-work ice cream, so a late dinner-snack might be in order. And if the 8-Word Eggs refuse to wait until morning, who am I to hold them back? We all know that eggs really must be allowed to be eggs.


Sunday, February 10, 2013

Science Egg


Behold! A science egg with fascinating properties!

Several weeks ago, I read in a magazine that you can cook sunnyside-up eggs in the oven. I did so. I thought, such eggs will be perfect on the bi bim bap I was making. The eggs came out of the oven perfectly cooked, glistening and amazing. While admiring them, though, I was also giving myself a third-degree burn on my hand, as I had chosen to relocate the very hot skillet with my bare flesh. As I proceeded to treat my wound and curse violently, I watched the eggs get smaller, stranger, and harder. By the time I was ready to actually apply the eggs to the dish, they were the consistency of unbreakable glass. Completely inedible, lest we desired a series of gashes in our esophagi. The good news is, though, that everyone survived! The egg was photographed two weeks after the event, and it looked like this. Can you believe it? Even sharper and more dangerous looking! My hand healed, though I did do lots of whining about it. And the bi bim bap? Well, it didn't need any sad, pitiful eggs! We made do just fine!

Wednesday, December 12, 2012

You're Everything I Need*


*This is such a great tool for people who are without those really rare, hard-to-come-by cracking surfaces, like countertops and bowl edges. Also REALLY good for folks who live in places that are too soft to crack eggs anywhere, like in a cloud, or inside a pancake, or in a cotton ball. And useful for those who live in regular places, but like to crack their eggs into the air, rather than into a bowl. And, let us not forget that it's easy to carry, which means you'll never ever have to leave home without your easy egg cracker!

Relief is ours, friends. Relief is ours.

Sunday, October 14, 2012

Eggs-cellent


All meals have just been improved. It's because the 6-minute egg has entered my life, and I'm in love! It's amazing. So keep reading, if you will, and I'll turn you into a wizard.

It's been around forever, this egg style, but I had my first one only recently. This particular 6-minute egg found its way into an incredible, rustic-yet-classy breakfast that Colleen and I had a Lula several Fridays ago. You may find yourself linking over to this restaurant's site and feeling quite seasick because of those godforsaken blinking squares, but if you can get past that, head over to the brunch specials and you'll likely see a 6-minute egg somewhere on the menu (the current one sounds pretty amazing). Ours was served with black quinoa, watercress, some other weeds-worthy green things, obscenely pungent black garlic, a sweet potato pavé, sautéed apples, and some other odds and ends. And it was incredible. The black garlic punched me in the face, but you know how fermented foods are. Is it good? Is it bad? It tastes so good! It tastes so bad! Should I actually be eating this?!

They've quite mastered this egg preparation, I think, and, well, you know me -- I can't have OTHER people mastering things while I stand idly by! So I'm learning. Rather, Andy and I are learning. He doesn't consider himself much of a cook, but he likes the magical process of this egg-cooking method because he is A Science Person. Plus, it's impossibly, beautifully simple, and that means a lot to a guy who thinks that even a frozen pizza feels like a bit too much work sometimes.

The 6-minute egg can be a good main course for breakfast, of course, but it's also the perfect touch for any kind of salad, or as the crown on nearly any type of rice dish. I could see this on greens or grains, Indian food or Thai food, or anytime that your meal needs a little flair or a little punch of protein. Think about serving the egg with a good toast, or polenta, or a nice sauce. I could also see this egg with a meat dish, like with a steak, or pork. Be sure to sprinkle your finished eggs with good salt, pepper, and a little olive oil. It's unexpected, this egg, and really sort of like a treasure.

So, let's talk consistency. The texture of the egg is going to blow your mind. The white is similar to that of a poached egg, so it holds together, but isn't rubbery, and the yolk stays together, but is also quite soft at the same time. The process of spilling your yolk in any type of soft-yolk egg preparation is so satisfying, but often a little too wet for me, so I love this 6-minute method because your yolks will not be completely liquid-like, nor will they be cooked. It's the perfect in-between yolk state, and I do believe you'll love it quite a lot.

6-Minute Eggs

Short version:
Boil water.
Cook eggs for 6 minutes.
Move to ice bath.
Remove and peel.

More-words version:
Start with room temperature eggs. (Hate to break it to you, but this part is really important! If the egg is too cold, it'll crack as soon as it hits the boiling water. But sometimes I cheat by microwaving the eggs for about 15-20 seconds in order to mock room temperature.)

Bring a pan of water to a boil. There should be enough water in the pan to cover the eggs completely. When the water is at a rolling boil, carefully and gently lower your eggs into the water with a slotted spoon. Set the timer for 6 minutes.

Meanwhile, prepare a bowl of ice water, using about two-thirds ice to one-third water. Keep the water boiling the whole time. At the end of the 6 minutes, remove the pan from the heat and quickly remove the eggs from the pan with the slotted spoon. As you remove them from the boiling water, carefully and gently lower them into the ice bath.

Leave in the ice bath for 20-30 seconds, or up to a few minutes. This part of the process will cause the egg white to separate from the shell and make the egg easier to peel. If you keep it in the ice water for a short amount of time, the egg itself will stay warm, and that's what you want (and by that I mean "that's what I want" -- so it's up to you!). Crack the eggs on a hard surface very gently on all sides, and peel off the shells, being careful to not damage the egg at all. Clean off the membrane and any shell bits and serve immediately.